Sunday, May 31, 2009

Video Post Numero Dos!

Yay for video posts! I got two for you today—one for Whole Wheat Fennel Rolls and one for my homemade Rustic Tortellini Soup! I will post the recipes below in case you don’t want to watch me blabber on for 10 + minutes!(Don’t worry I will understand ha!) Have a wonderful Sunday.

 Whole Wheat Fennel RollsCIMG0137

 Rustic Tortellini SoupCIMG0130

<<Recipes>>

Rustic Tortellini Soup

Ingredients:

  • 1/2 C butternut squash, chopped
  • 1/2 C zucchini squash, chopped
  • 1/2 C diced bell pepper(preferably not green)
  • 1/2 C sliced yellow onion
  • 9 oz bag of frozen spinach, thawed
  • About 8 oz of cheese tortellini pasta
  • 6 C beef broth or other broth of choice
  • 1 C water, or 1/2 C water-1/2 C red wine
  • 1 can of sliced carrots
  • 1 1/2 tsp of minced garlic
  • 1 14.5 oz can stewed tomatoes
  • 2 8 oz cans of tomato sauce
  • Seasonings of choice

Directions:

  • Chop all veggies(including carrots with a little juice from the can, otherwise strained) and add the a skillet sprayed lightly with cooking spray. Sauté at medium heat until fork tender 3-5 min, adding the minced garlic right before the next step. Then add in both cans of tomato sauce, turn on low and let simmer until needed in the next step.
  • In a stockpot, add broth, water, noodles, stewed tomatoes, and spinach—stir together. Put stockpot on another burner and turn on low heat.
  • Add the sautéed veggies/tomato sauce to the stockpot, pouring carefully. Once you’ve done that, make sure to give it a good stir.
  • Add in seasonings of choice or even a shot of lemon juice, let simmer on low-medium for about 25-30 minutes until heated through. Make sure to keep stirring to avoid things stuck to the bottom of the pan.
  • Enjoy!

Whole Wheat Fennel Rolls

Makes: 16

Ingredients:

  • 1/3 C warm water (105-115 F)
  • 1 Tbsp honey
  • 1 envelope (1/4 oz) active dry yeast
  • 2 Tbsp fennel seeds + 1 more for sprinkling
  • 2 1/4 C all-purpose flour
  • 1 3/4 C whole-wheat flour
  • 1 cup warm skim milk
  • 2 Tbsp olive oil
  • 1 1/2 tsp salt
  • 1 egg white, lightly beaten

Directions:

  • In a small bowl, whisk together the warm water and honey. Stir yeast into the water mixture and let stand until foamy, about 7 minutes.
  • In a large bowl and add fennel seeds, all-purpose flour and whole-wheat flour. Whisk to blend, then make a well in the center of the mixture.
  • In a small bowl, stir together milk, olive oil and salt. Pour into well of flour mixture, along with yeast mixture. Stir until dough comes together. Knead until smooth, 5 to 10 minutes.
  • Place dough in a lightly greased bowl, turning to coat. Cover with a damp, clean towel and allow to rise 45 minutes. Punch down dough, then knead lightly. Divide into 16 pieces, then roll each into ball, tucking any seams under. Place on a large nonstick baking sheet and cover with damp towel. Let rise in warm place for 45 minutes.
  • Heat oven to 375°. Uncover dough, brush rolls with egg white, then sprinkle with remaining 1 tablespoon seeds. Bake at 375° for 20 minutes, until lightly browned and hollow-sounding when tapped lightly. Serve warm.

CIMG0135

Friday, May 29, 2009

C’mon and do the Twist!

A pretzel twist that is—unless of course you really feel like busting out a move and dancing that’s a-okay with me!! Today I finally got around to making homemade pretzels! I have had this on my endless long list of recipes to make for awhile now and I guess the whole sound of “making pretzels from scratch” sounded a tad bit daunting. Good thing I was up for the challenge—and I was glad to find out that it wasn’t such a challenge after all, which means you can get in your kitchen ASAP and make them!

I got this recipe from my Food Network magazine and it was under their monthly feature Copy That where they try to recreate a “secret” recipe. This one of course was a replica of the famous Auntie Anne's pretzels. The verdict? I think they came out pretty close! So here’s the recipe and in the bold print is the changes I made to the original ingredients. I also made 12 mini pretzels instead of 6 jumbo, and I calculated the nutritionals using my adaptations and for one mini pretzel with a dusting of cinnamon, it will set you back just 110 calories! And being a “mini” pretzel, they are not really mini at all.

Food Network’s Almost-Famous Soft Pretzels

Active: 45 min Total:1 hr (plus rising) Makes: 6 pretzels or 12 mini

Ingredients:

  • 1 cup milk
  • 1 package active dry yeast or 1 packet fast rising yeast
  • 3 Tbsp packed light brown sugar
  • 2 1/4 C all-purpose flour or 1 C whole wheat+1 1/4 all-purpose
  • 2 Tbsp butter, plus a few more for brushing on pretzels
  • 1/3 C baking soda

Directions:

  • Warm milk in saucepan until 110 F; pour into a medium bowl and sprinkle in the yeast. Let the yeast soften, about 2 mins; stir in brown sugar and 1 C flour. Dice 2 Tbsp butter and soften; stir into the mix. Add the remaining 1 1/4 C butter and fine salt to make a sticky dough. Turn the dough out onto a lightly floured surface and knead, adding more flour if needed, until smooth but slightly tacky, about 5 minutes. Shape into a ball, place in a lightly greased bowl and cover with plastic wrap. Let rise in warm spot about 1 hour or until doubled in size.

CIMG0105

  • Preheat oven to 450 F and grease a large baking sheet. Punch the dough to deflate it, then turn out onto a lightly floured surface and divide the dough into 6 pieces or 12 if your making the mini pretzels. Roll and stretch each piece with your palms into a 30 inch rope. (15 in for minis) Form each rope into a pretzel shape.

CIMG0110

  • Dissolve the baking soda in 3 C warm water in a shallow baking dish. Gently dip each pretzel into the soda solution and arrange on the prepared baking sheet. Bake until golden, 10-12 minutes.

CIMG0113

  • Melt a couple tbsp of butter and brush over the top.(The original recipe called for 8 TBSP of butter, and then to dip the whole pretzel in, but who needs all that butter?!) Their recipe called for a coarse salt topping, but I decided to take it a step(okay maybe 5 steps) further and turn these into some special pretzels—check it out!

  • Pretzel Number One

CIMG0117

The Peanut Butter and Jelly Pretzel

Figured I would dedicate this one to one of my favorite bloggies over at Peanut Butter and Jenny! It was just some strawberry jelly slathered on, covered by 2 Tbsp of melted PB chips.


  • Pretzel Number Two

CIMG0119

Pineapple Cream Cheese and Coconut Pretzel

Of course this pretzel needed to be dedicated to another sweet girl Laura at Pineapple Gurl! 1 Tbsp of Pineapple Cream Cheese topped with 1 Tbsp flaked coconut.

  • Pretzel Number Three

CIMG0118

Plain Jane Powdered Sugar Pretzel

Unfortunately, I know no bloggers by the name of Jane, so no dedication here. Just a sprinkling of powdered sugar made it taste like funnel cake from the summer fair!


  • Pretzel Number Four

CIMG0121

Double Chocolate Devotion Pretzel

1 Tbsp of chocolate frosting with a sprinkling of chocolate sprinkles.


  • Pretzel Number Five

CIMG0122

Chocolate Peanut Butter Bonanza Pretzel

1 Tbsp of chocolate frosting and some sliced peanuts.


  • Pretzel Number Six

CIMG0123 (2)

Choco-Walnut Bliss Pretzel

1 Tbsp chocolate frosting with 1 Tbsp crushed walnuts


  • Pretzel Number Seven

CIMG0124

Cinnamon Sugar Pretzels

(2 in the middle)

Gotta go for now guys—my phone is ringing, I think it may be Auntie Anne’s calling to hire me! =) Have a fab Friday!

Thursday, May 28, 2009

Dining True to My Roots—Italian Style!


ItalianHappy Thursday all! You may or may not know that I am almost a full-blood Italian. Both from my mom and dad’s side, so I am pumped full of all the traits of an Italian! (That could be good—great food heritage, or bad—very stubborn) What does your background consist of? But I find it quite funny that I am not a total pasta and pizza fanatic—I think I ate more than my share growing up and now just have it every once and awhile. Another thing I noticed is our family very seldom has an Italian based dinner, so tonight I decided I was going to bring some Italian flavor to the kitchen thanks to Brandi over at Bran Appetit and her tantalizing post of this recipe! Let’s just say it was great bon appétit! I got the original version here, but I subbed a bunch of ingredients to make this a little more on the healthy side. Turning recipes healthier is so easy to do and often won’t cost you any more either.

  • I used whole wheat ziti pasta instead of the regular.
  • Instead of 1 lb Italian turkey sausage, I used 2 C Boca crumbles and 3 apple harvest chicken sausages.
  • Used organic diced tomatoes with less sodium.
  • Low-fat ricotta instead of the full fat counterpart.
  • Didn’t use the butter for the baking dish, just gave it a light spray with cooking spray.
  • Brought the cheese from 3 1/2 C of a mozzarella/parmesan combo down to just 2 C of a shredded Italian blend and a sprinkle of sharp shredded cheddar on top. (Tip: Use sharp cheese to cut down on the amount/calories but still get big taste!)

I put together a little slideshow of how this whole meal went down—any questions, you know where to catch me!

 CIMG0100

And make sure to check out where my strawberry rhubarb bars showed up—but with a different twist!


Tuesday, May 26, 2009

Yummo, Delish, and EVOO Style

Yup, today at a Pinch of This, a Dash of That it’s all about Rachael Ray. Some people love her, some people despise her—I happen to love her and find her overly cheery stature infectious and entertaining. I also give her major props for getting as far as she has in the food industry without any culinary degree—YES it is possible! =) I can only hope, right?

I’ve subscribed to her magazine Everyday With Rachael Ray since it started (did ya’ll know the favorite southerner, Paula Deen launched her own magazine now too?! Just got the first issue the other day!) because it is plump full of totally useful cooking info and of course some fun from front to back. And it’s reasonably priced too. Of course I always get my magazines the frugal way from here! So anyhoo, I decided it was time for Rachael to make a guest appearance (since she hasn’t yet!) and so I picked out a recipe that was somewhat challenging, yet very “delish” when completed. Her Lemon Chicken Not-Potpies with Poppy Seed Crust were a unusual twist on the traditional pot pie. Now I am not the biggest chicken pot pie fan out there, but of course I am a mean food critic(haha), and I know for a fact that a good homemade pot pie is 100x better than the kind you pop in the microwave—filled with preservatives and rubbery chicken—you get the drift. Pretty much anything homemade can top out store bought! Plus it can be much cheaper. The only drawback for this recipe was that if you don’t have 2 ingredients (poppy seeds & puff pastry sheets) they ran a little high priced at my grocery store. But of course it’s the only big chain store in town so they have no competition and can charge basically any price! I should have driven to Wal-Mart 20 minutes away! So besides that, everything about this recipe was great! I think the pictures speak for themselves. So check out the recipe here and then follow along on my homemade pot pie adventure.

  • FYI, the only change I made to this recipe was instead of the white wine, I just added some more chicken broth.

CIMG0068

* When boiling potatoes, always make sure you add the salt! Why? It makes the water reach a rolling boil faster.


CIMG0071

* Of course EVOO has to make an appearance here. In this case it is used in the skillet to sauté the chicken. Quick tip: I always grab these nice packets of EVOO from Subway—hey olive oil is expensive otherwise, this is much more thrifty, plus the perfect amount for one meal.


CIMG0062

* After you’ve traced and cut your puff pastry circles, make sure to brush the egg evenly over the surface.


CIMG0066

* Sprinkle the poppy seeds over the egg-brushed puff pastry circles. I just love poppy seeds!


CIMG0072

* This is how they look once they’re out of the oven. Check out that divine puffiness! 8-)


And the final result…

CIMG0075

“Yummo!!”

p.s. Be sure to check out an awesome Build-Your-Own-Bar giveaway here!

Monday, May 25, 2009

Showers of Joy!

home of the brave graphic

Happy Memorial Day! 

Happy Monday all! I’m sure everyone who works has is off—hopefully! Memorial Day signifies the unofficial kick-off of summer and usually a time to just have a big bash with friends and family. But, of course it is so much more, and much more important than just another day. I have no immediate family members that have or are serving in the armed forces, but for those of you who do I will keep you and your soldier(s) in my prayers and give thanks for them continuously. If it wasn’t for people with that type of courage, those of us here in the US would likely not be as free as we are today.

Now onto some food business, because I am sure that’s what your all looking for! =) As I mentioned a couple days back, I was asked to make a cake for a baby shower. I was super excited because I had the perfect cake I clipped out of a Woman’s World issue a couple months back and was hoping there’d be an occasion to make it. It was rather time consuming (2 days from start to finish—about 3 hours into it I would say), but usually cakes are if you want to put a lot of detail into them! You better believe I had my camera handy every step of the way, so now I present to you my Showers of Joy baby shower cake. (Btw, if anyone wants the rundown step-by-step on how to make this, I would be happy to photocopy the directions—It’s simply too long to type out on here, so email me!)

  • The flavor of the cake was a white cake mix with chocolate chips and toasted almonds mixed in and a layer of chocolate frosting in between—yum!

CIMG0085

CIMG0070

CIMG0059

CIMG0060

  • I always use this cake tool to frost my cakes. I got it for free at a Taste of Home cooking show and I have 2 more thanks to my mom and grandma! Love it! (Tip: When frosting cakes, keep a small dish of cold water to dip your utensil in while frosting—it makes for a much smoother appearance.

 CIMG0061

  • Decorations included: Marshmallows, vanilla wafers, starbursts, assorted jelly beans, crystal light candies and chocolate teddy grahams.

CIMG0079

CIMG0080

CIMG0084

CIMG0085

Stay tuned tomorrow for a spin on a great Rachael Ray dish!

Saturday, May 23, 2009

S’more Please!

   I am ready for bonfire season! Do you guys camp out or have bonfire parties with friends and family? I am not a “camping” out kinda gal, but I do love a backyard bonfires a couple nights a week with all our neighbors, fun, and of course s’mores need to make an appearance. But our neighbors fire pit down the block is under construction, so we are in the midst of getting our own up here to move things around temporarily. So until then, I decided these s’more bars would have to be a good stand-in for the real thing!

   I got the recipe here but of course I made a few minor adjustments! Did you actually think I would just follow the recipe. =) Instead of using the 2 king-sized milk chocolate bars, I used 2/3 C of milk chocolate chips just because I thought with the marshmallow crème and all it would just be a sweet overload! Also a couple tips for the recipe I conjured up:

  • Make sure you spray the pan well even if you use tinfoil!
  • I found microwaving the marshmallow crème before spreading it on works well—otherwise it can get sticky and messy. 
  • Sprinkle the top with some mini white chocolate chips if you want to jazz it up even more! I think it made them extra special.

  Of course I put together a photo tutorial of this recipe for y’all. For me I love looking at pictures along with a recipe—hope you feel the same!

Smore

Mixing up the dough CIMG0038 Spreading into the pan

CIMG0039

Here come the chocolate chips!

CIMG0041

Marshmallow crème anyone?

CIMG0042

Top it off and sprinkle with white chocolate if you choose.

CIMG0043

Baked goodness fresh from the oven.

CIMG0048

And a few more shots for your drooling pleasure..

CIMG0051

CIMG0052

Have a super beginning to your weekend!

Friday, May 22, 2009

Sushi+Facelifts..You’re Better Off Just Reading =)

Wow! Can you believe it is already Friday?! I can’t! This week flew by for me, although the whole summer is usually gone in a blink of an eye—wish I could say the same for winter.

I interrupt you for a brief news announcement: This weekend I am going to be working hard at giving the good ol’ blog a facelift. Yes it’s time! I figured since all of you take your time to read it (thanks and thanks again!), I should dedicate some time to making a page with all organized recipes and reviews for your viewing pleasure. Also, I am going to try and start doing more video posts! Hope it sounds all good to everyone! So if things around here look a little crazy Saturday and Sunday it’s because..

Now back to the show original message: With this weekend being Memorial weekend, I am sure you all will have tons of great plans! I have so nice and laid back plans—I definitely still need to unpack some boxes from college..procrastinate much? And I am baking the cutest cake for a baby shower on Sunday, so you will not want to miss it even if you don’t have any baby showers in your future, you can bookmark it for when ya do!

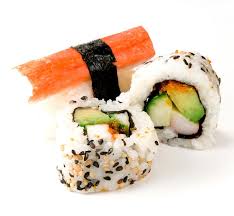
Now onto the whole sushi deal—I have never ever tried sushi and I am dying to! Why haven’t I? Well hick town up here in Minnesota has sushi that is either hiding out or just plain nowhere to be found. Every time we travel I cannot find it where we eat, and so I am starting to wonder if my dearest sushi and I will ever meet? Have you tried sushi? So for now I figured out another way to get at least the health benefits of sushi even if I cannot get a taste—yet. Thought I’d share in case your in the same boat!!


  • It definitely won’t set your tongue on fire, but if you’re looking for a new way to getAlterna Life Volumizing Spray Mousse 10.5oz your wasabi fix Alterna Life Volumizing Spray Mousse. It’s infused with wasabi and helps keep those new summer highlights from fading.


  • Of course we can’t Fresh Rice Dry Oilleave out the rice, one of the main components in sushi! Try out a bottle of Fresh Dry Rice Oil for a nice little massage action =)


  • And last but not least, to sum up our sushi roll we need sake! All the way from Japanese brewers it is a staple in sushi. This will give your bubble bath an extra boost with a foaming infused vanilla experience.